Wednesday, April 25, 2007

Summertime = Ice Cream

There is nothing like a great dish or cone of ice cream in the summer. Yes, it's still spring here, but this weekend we had some amazing weather, and it felt like summer. It's even better when the ice cream is homemade. It takes a while to do, but when you wrap your lips around that spoon, it's all worth it. I'm from Vermont, and remember when Ben & Jerry's was just a couple of hippies selling ice cream out of an old gas station. I remember having chocolate chip... and it was real vanilla with real chocolate morsels in it. Not like the gloppy messy flavors they're selling now. This was the real thing: creamy, rich, refreshing, and filled with empty calories.

A couple of years ago I made some vanilla ice cream for a friend of mine, in honor of her birthday. It was my first time making ice cream, and it pretty delicious. Since then I've made it for special occasions - from start to finish, it takes about 24 hours to properly have everything done. Recently, I was reading Amy Sedaris's Cookbook and a recipe caught my eye: Coconut Custard Ice Cream. I'm not a huge fan of coconut, but I thought I would give it a try. I'm so very glad I did. You can try it too - and buy her fantastic, over-the-top production values book. It's pretty hilarious.

Take your chilling unit from your ice cream maker and place it in the freezer. I use the Cuisineart 1-1/2 quart ice cream maker. It's easy to use, and easy to clean. If you have one of those hand-cranked things that you have to pack with ice and salt, you're on your own here. Follow manufacturers directions for preparation.

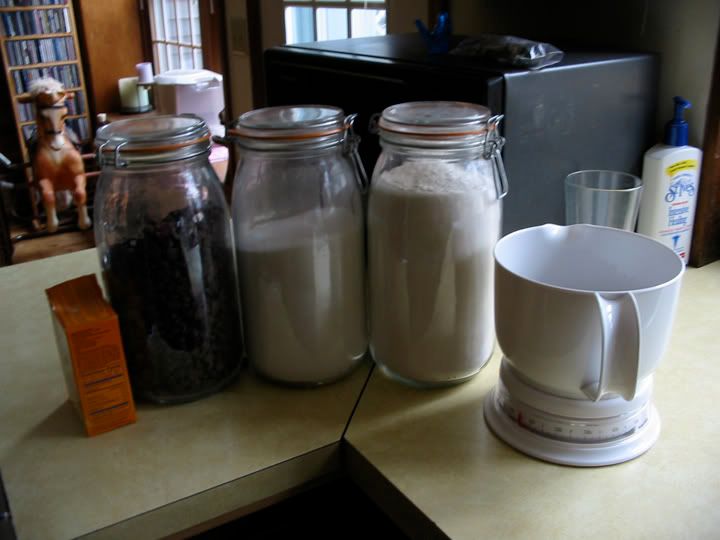
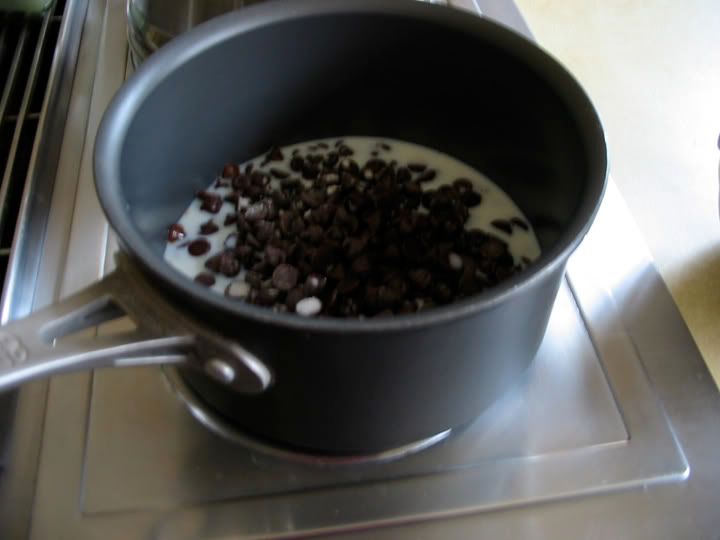
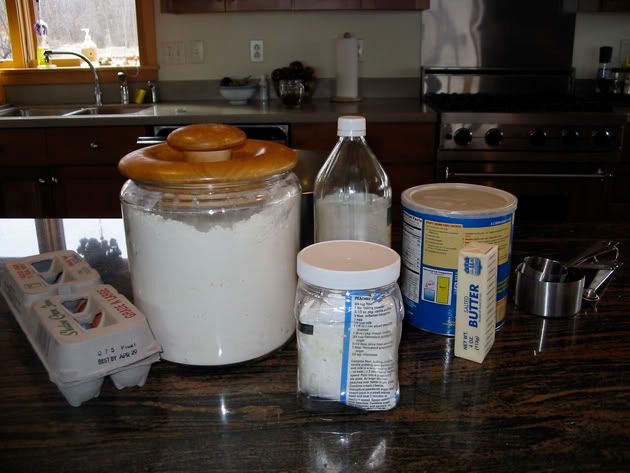
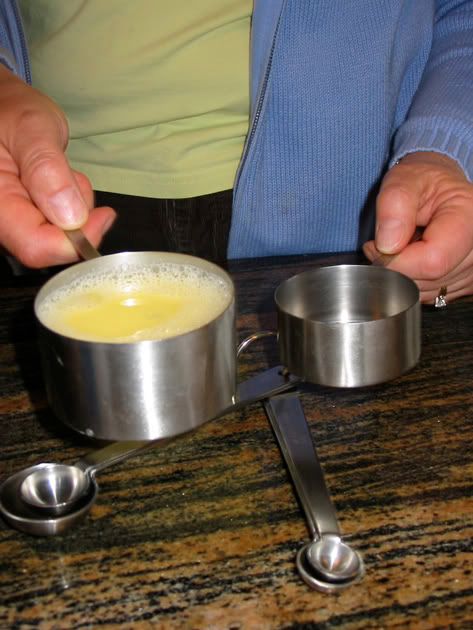
Take 2 cups heavy cream, 3/4 cup sugar, and 3/4 cup of cream of coconut (Pepe Lopez works - and tastes - great). Whisk together over low heat in a double boiler or a heavy saucepan. Do not allow this mixture to boil - it will curdle the cream and you'll have to start over. Stir occassionally and heat until it's 175'. While you're waiting for it to come up to temp, take 4 eggs and whisk together. Add 3/4 cup milk (you can use any kind of milk - I use the 1% to save on calories. Yeah, right), mix well. When the cream mixture is up to 175', remove from heat. Take about 1/2 cup of the cream mixture and, while constantly stirring, slowly add it to the egg mixture. This is called "tempering" and it keeps your eggs from cooking (if you were to plop them into the hot mixture you would end up with a very expensive, creamy batch of sweet scrambled eggs) by slowly bringing their temperature up. Amy says to use a couple of tablespoons, but I add about 1 cup total, continually stirring. Then slowly add the egg mixture - which has now been tempered - to the cream mixture
Photo Sharing and Video Hosting at Photobucket

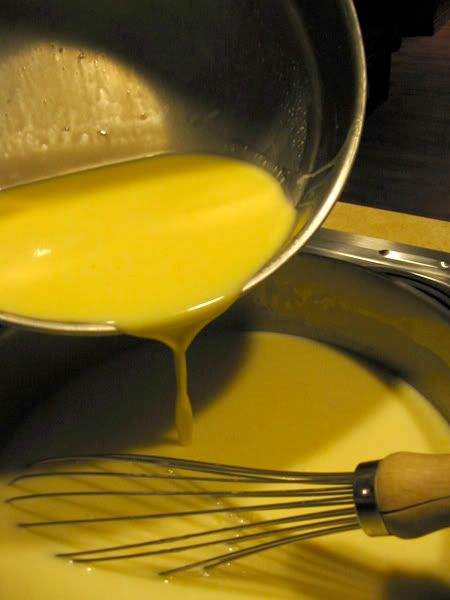
and put it back on the heat. Heat until it is smooth and slightly thickened, to 160'. Stir this mixture constantly. When it comes up to heat, add 1/3rd cup sweeted grated coconut. Stir everything together, place in a bowl, and cover with plastic wrap.
Photo Sharing and Video Hosting at Photobucket
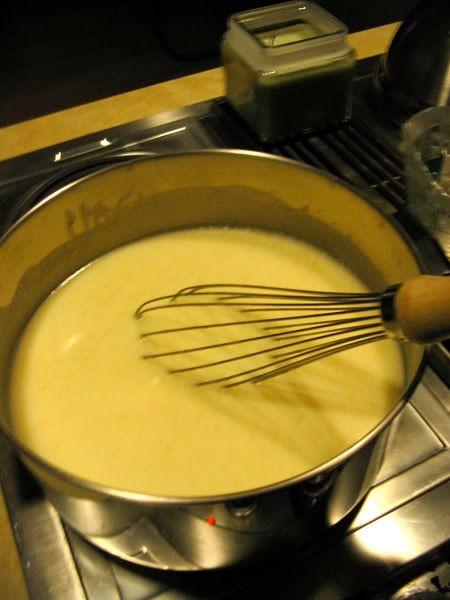
Make sure the plastic wrap is touching the top of the ice cream base; it doesn't need to be stretched across the top. If you don't cover the mixture itself, it's going to form a skin on top of the mixture.

This mixture needs to chill for at least 3 hours, and I recommend chilling it overnight.

The next day, take your chilling unit from the freezer, assemble the ice cream maker, start 'er up, and slowly pour the ice cream mixture into the mixer. It takes anywhere from 30-45 minutes to freeze. I like to test it periodically to see if it's ready (and, yes, to taste it). When it seems set - similar to a good soft-serve ice cream - place the ice cream into a reclosable container (like tupperware) and freeze for another 3-4 hours, until solid.

Photo Sharing and Video Hosting at Photobucket
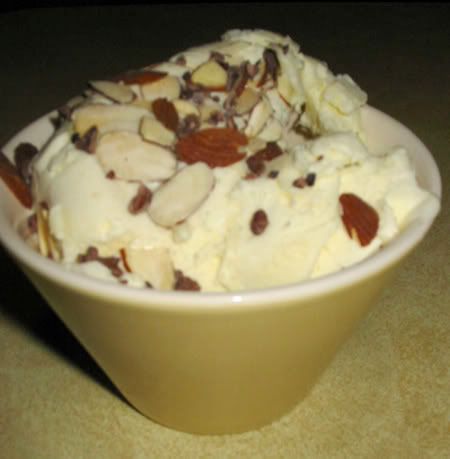
Dish it up, garnish with some toasted sliced almonds and some cocoa nibs, and enjoy!

This is a treat well worth the wait. It's absolutely scrumptious. Not a low-calorie dessert, but a nice treat for special occasions. A note: these pictures, particularly of the prep, were for a batch that was 3 times what the original recipe calls for. I had to make ice cream for a bunch of people this weekend.

Enjoy!

Wednesday, April 18, 2007

Coming soon!

I don't often bake during the week... there are too many other things to deal with... BUT this weekend the women from my mom's side of the family are coming for a wine-food-gab-laugh fest, so I will have a couple of recipes to post next week: Praline Pecan Cake with Cream Cheese Frosting (my aunt's favorite cake) and Coconut Cream Ice Cream. The Bakery, she loves you so much, she'll make you ice cream any time.

So please stay tuned!

Monday, April 16, 2007

These are fun

I got this from Mellbury Observer. Love these things. And, since it's kitchen/household-related, it belongs on this site.

Housekeeping A to Z

aprons - y/n?
Yes. I have some from many different periods in my life. I don't always remember to wear them, though.

baking - y/n?
As much as I can! And now I can say that I need material for my blog. Heh heh,

clothesline - y/n?
Not really. I have something that I lay sweaters out on. I'd like to get a clothesline for this summer, though.

donuts - ever made them?
No, but I remember my great-aunt making them

everyday - one homemaking thing you do everyday?
Cook. Or clean.

freezer - do you have a separate deep freezer?
No. We had a party-fridge, but had to unplug it to save $$. We had a deep freeze that someone gave us but it never worked, so it got hauled away last summer.

garbage disposal - y/n
No, but I have a compost bin. Or, as G calls it, a "controlled rot pile".

handbook - y/n?
What exactly are you asking here? I have a ton of cookbooks and magazines... do those qualify as a handbook?

ironing - love it or hate it?
Hate it. Avoid it whenever I can.

junk drawer - where is it?
Next to the fridge. That thing is out of control.

kitchen - design and decorating?
There is stuff there and I keep it under control. There is no decorating. The design is one of a glorified galley kitchen - it's a U-shape. It's efficient, though. I have no major complaints. I hope to have a gas stove and new counters before the end of 2007.

love - what is your favorite part of homemaking?
Making a delicious meal or baking something that calls everyone to the kitchen to taste.

mop - y/n?
I should do it once a week. If I get to it once a month that's good. It's hard to do, especially with 2 dogs. Very hard to keep clean.

nylons - wash them by hand or in the washer?
How about "avoid wearing them as much as possible"?

oven - do you use the window or open it to check?
Open. The window is tiny and dark.

pizza - what do you put on yours?
Cheese, or garlic & chicken, or onions and meatballs. Mmmmm.... pizza.....

quiet - what do you do during the day when you get a quiet moment?
Sleep, knit or read. Since I work outside of the home, I don't get much of a chance for down time.

recipe card box?
Yes, and magazines, and cookbooks, and binders....

style of house?
Cape

tablecloths and napkins - y/n?
When it's a special occassion, yes. Otherwise, G and I get linen napkins (not ironed) and P gets a paper one.

under the kitchen sink
Dishwasher stuff. A gallon of water.

vacuum - how many times a week?
Once or twice a week. I should do it more. Again, I work outside of the home, and have a 2 hour commute, so 2 times a week is as good as it's going to get.

wash - how many loads do you do a week?
Between 2 and 4, depending on if we have guests over the weekend.

x’es - do you keep a list of things to do and cross them off?
It's one of my most favorite things to do.

yard - who does what?
G mows, I complain about everything being overgrown. I have a kitchen garden that I hope to keep reined in this summer. We're also planting wild flowers, not vegetables, in our garden. Sometimes I go out and have a mad clipping frenzy on the shrubs.

zzz’s - what is your last homemaking task for the day?
Tidying everything up, putting things (toys, books, remote controls) away. "Resetting the room".

Sunday, April 15, 2007

Schwartzwalderkirschetorte (say that 10 times fast)

We were invited to dine last night at the home of some friends, and, when I asked what we could contribute to the meal, I was told that the cuisine would be German-themed, and to go from there. I hearkened to my German classes from college, and could remember "nicht" so I decided to make a schwartzwalderkirschetorte or, literally, Black Woods Cherry Cake - Black Forest Cake. I don't know much about the history of this cake; only that I remember my mother made it for a brief period of time when I was a child. Opening the refrigerator and seeing this bohemouth shuddering there as it chilled was a close form of torture, because it was usually for a party they were having or going to, so it was hands off for me.

I got out my ingredients, and got to work yesterday morning:
Photo Sharing and Video Hosting at Photobucket

In a heavy saucepan I combined 12 oz of semi-sweet chocolate morsels, 1/2 cup of milk, and 2 tbsp sugar.
Photo Sharing and Video Hosting at Photobucket

Over low heat, melt the chocolate with the milk and sugar, stirring constantly. Once the chocolate has almost all melted, remove from the heat and stir until it has all melted. Set aside.

In a small bowl, combine 1-3/4 cups all-purpose flour, 1 tsp baking soda, and 1 tsp salt. Set aside.
Photo Sharing and Video Hosting at Photobucket

In a standing mixer or, in a bowl with a hand mixer, combine 1/4 cup butter (not rock hard, but not melted either) and 2/3 cup sugar. Cream together until well mixed. Add 3 eggs, one at a time, until the eggs have been blended into the mixture. Add 1 tsp vanilla, blend.

Take 1/3rd of the flour mixture and combine with the butter & sugar mixture, mix well. Slowly add in 1/3 cup milk, mix well. Add another 1/3rd of the flour mixture, mix; then another 1/3 cup milk, mix. End with the final 1/3rd of the flour mixture (when making a cake, you always want to start with the dry ingredients, add wet ingredients, and end with the dry. In all recipes that I am familiar with, it's best to do the dry in 3rds and the wets in halves).

You may want to stop the mixture periodically and scrape down the sides with a rubber spatula, to make sure that all ingredients are combined. When this mixture looks pretty uniform, slowly add in the chocolate and mix well.

Take 2 9" cake pans (round, square, what have you) and butter and flour well. I've read that for chocolate cakes you can use cocoa powder to dust, and I tried that this time:
Photo Sharing and Video Hosting at Photobucket

I found that the cake did not release well from the pans this time, and I think it's the cocoa because this has never happened before. It's an esthetic thing, I think: god forbid you have little bits of flour on the sides and bottom of your cake! For shame! So, I recommend that you stick with the flour - it's tried and true. My opinion.

Divide the batter into the 2 cake pans, and place in a pre-heated 350 degree oven. The recipe that I have says to bake for 25-30 minutes, but I found that the cakes were almost overdone, so I would say to try it for 20-22 minutes and then check for doneness.

While the cakes are cooling, take 2 cups of whipping cream and mix in a mixer until stiff. Add 1/3 cup sifted confectioners sugar and mix together. You can also add 3 tbsp brandy if that's your bag (I don't care for liquor in things other than cups, so I leave it out).

Once the cakes have cooled, remove from the pan. Take one layer and place on your cake plate.
Photo Sharing and Video Hosting at Photobucket

Slice the layer carefully in half (I have a hard time with this "carefully" business: it's hard to slice them evenly)
Photo Sharing and Video Hosting at Photobucket
and put 1 cup of whipped cream on the divided layer. Take 1/3rd of a can of canned cherry pie filling and spread it over the whipped cream, and try to keep everything about an inch from the edge.
Photo Sharing and Video Hosting at Photobucket

Continue until all layers are completed
Photo Sharing and Video Hosting at Photobucket

Finish off the top of the cake with the rest of the whipped cream. Take a bar of dark chocolate and make curls (with a vegetable peeler), and sprinkle the curls on top of the cake.
Photo Sharing and Video Hosting at Photobucket

If you're not planning on eating this immediately, refrigerate to allow it to set up. You wouldn't want to keep it in the fridge for too long, though, unless you have it covered - and not with plastic wrap, because it will squash the whipped cream.

I hope you enjoy this! It has the potential to be really lovely, and it's an interesting mixture of chocolate, cream, and cherries. Let me know what you think.

Friday, April 13, 2007

The best thing to happen to Cheerios in a while

Cheerios have been around for about eternity and, since I have a small child, they are ubiquitous - in the car seat, in between the couch cushions, on the floor, etc. However, this is a fun little snack that one of my co-workers turned me on to. I will warn you: these are not esthically pleasing to look at. In fact, they are somewhat offensive. But they taste delicious and, I dare say, aside from an apple or another fruit or some carrot sticks, they are not too terribly bad for you either. And the recipe is rather interpretive, so feel free to make these your own.

I call them Those Cheerios Things and here's what they look like (prepare yourself: they are hideous):
Photo Sharing and Video Hosting at Photobucket

Take a quantity of high-quality dark chocolate (rule of thumb here: the higher the cacao content, the better the chocolate for you in terms of anti-oxidents) - I think this time around I used about 8 oz - and melt in a heavy saucepan over very low heat. When you notice it has started to melt, start to stir and keep stirring until it's almost all melted. To facilitate and expedite the melting process, you can chop it up into small pieces. I didn't want to get my cutting board and knife dirty, so I didn't do that this time. When it looks like almost all the chocolate has melted, take it off the heat and keep stirring until it has all melted. Stir a couple more times for good measure.

While the chocolate is still hot, stir in a bunch of Cheerios or other toasted oat cereal (I sure hope General Mills doesn't come after me for not putting a TM or R after that word up there). I think I used about 4 cups. Stir until all the toasted oat cereal has been uniformly coated with the chocolate. You might want to add a little more, depending on how drippy the mixture is. Stir in your choice of other things: I used sliced almonds and dried cranberries this time around. You could use any other kind of dried fruit, or nut, whatever sounds good. I like the dark chocolate combined with the almonds and the cranberries because you're getting all kinds of antioxidents and fiber, along with the toasted oat cereal. G asked me to put some cayenne pepper on some of them, so I did - lightly -, and he seems to be happy. This adds a fabulous heat kick at the finish of the mouthful, it's fantastic. Chocolate and pepper go wonderfully together.

Drop them in rounded, generous tablespoons onto parchment, silpat or waxed paper that is on a cookie pan, and put them in the fridge for 10-15 minutes to get firmed up.
Photo Sharing and Video Hosting at Photobucket

These are not only scrumptious, they satisfy all kinds of taste cravings, and they are also filling so you can't eat a ton of them.

Let me know what you think of these recipes.... I welcome your feedback! And G says: "Don't forget a cup of coffee".

Monday, April 9, 2007

Make me a believer - An Easy Pie-Crust!

Not only was Jesus rumored to rise from the dead over the weekend, but my mom has taught me how to make an easy pie crust that I could beat up and not be afraid of. Miracles do happen!

We took a very simple pie crust recipe and made 2 pies... well, a pie and a "free form" tart. This isn't the most healthy recipe, but really we all know that the best pie crusts are actually made with lard, and crisco isn't as bad as that even. This recipe makes enough for 6 crusts (enough for 6 single-crust [like chocolate-cream pie] or 3 double-crust [like an apple pie]), and it is very easy to "halve" in case you only want one or two pies. The rest of the crust will keep, tightly covered, in the fridge for up to 6 weeks - perfect for summer berry pies or winter apple, pecan, or pumpkin pies.

Here's what to do:

Photo Sharing and Video Hosting at Photobucket

Take 2 sticks of butter, 2 sticks (or the equivalent cup measurement) of crisco, 4-1/2 cups of flour, 1/2 cup confectioner's sugar (optional), 1 tablespoon white vinegar, 1 egg, and enough water to fill up a 1-cup measurement after the egg and vinegar have been put into that 1 cup.

To measure out the liquid:
Photo Sharing and Video Hosting at Photobucket

Whisk the egg and vinegar together in a larger bowl and place them in a 1-cup measuring cup. Add enough water to fill the cup. Stir. And, if you are only doing half of the recipe, fill a 1/2 cup measuring cup with this liquid, and pour the rest off. Easy.

Mix all dry ingredients and butter and crisco with a pastry blender until crumbly.
Photo Sharing and Video Hosting at Photobucket

Pour the liquid into the dry mixture, and knead until the dough is soft. Sprinkle the dough with flour if it is too sticky, to make it easier to roll out.

You can chill this dough for 1/2 hour in the fridge, or it can be used at once.

Roll out your crusts one at a time on a lightly floured surface - we used a linen towel. It's a good idea to have your pie plate at the ready, so that you can gauge how large you need to roll the dough.

Photo Sharing and Video Hosting at Photobucket

This is the tart, and we baked it on a pizza pan. After rolling out the crust, we filled it with 6 sliced apples that had been tossed with sugar, cinnamon, and tapioca (which absorbs the juice and keeps the pie from being too soggy).

Photo Sharing and Video Hosting at Photobucket

Ta-Da! Beautiful, easy rustic apple tart. This is also beautiful with berries.
Photo Sharing and Video Hosting at Photobucket

This is the pie shell - we pricked the bottom and the sides and baked it for about 10 minutes before putting in the lemon curd.
Photo Sharing and Video Hosting at Photobucket

And the after-shot (by after I mean After Dinner):
Photo Sharing and Video Hosting at Photobucket


If you want a shiny crust, you can brush it with a beaten egg. Bake at 400 degrees for 10 minutes, then lower heat to 350 until pie is done (check your pie filling recipes for specifics on this).

Thursday, April 5, 2007

My first recipe post - Chocolate Chip Cookies!

So last night I baked up some cookie batter that I had made on Sunday for my book club. You should know that when I bake, I do try and keep the ingredients "natural" - I don't use a lot of food coloring, or any false ingredients such as margarine or bisquick. I use King Arthur All-Purpose flour (when the recipe calls for regular flour... when it needs pastry or cake flour, I use that), which is a white flour that is not bleached. I also use Cabot butter - a local-ish business around here, and real sugar and local eggs when I can get them. Things taste differently, becuase the elements that combine to make the whole are of a high quality. It makes a significant difference. I like to keep the butter cold and sometimes I add a little extra flour - it bulks up the recipe and makes the cookies more chewy and round. They don't flatten out as they bake (and then burn).

So, back to the batter. I made some cookies the other day, and didn't bake everything up, because if it's all made and baked then I will eat them, and I am trying to watch my girlish figure.

Photo Sharing and Video Hosting at Photobucket
The larger lumps that you see here are milk chocolate chunks - I ran out of semi-sweet and, I have to say, I like the cookies a lot better - they have a variable taste: some semi-sweet bits here, some milk chocolate bits there.

I scooped everything out using a great spring-loaded cookie scoop - I think I got it from Pampered Chef, and it's a great tool for cookie or muffin batter, or ice cream.
Photo Sharing and Video Hosting at Photobucket

The pan in that photo is also from Pampered Chef - I've found that it is virtually impossible to burn cookies when I'm using a stoneware pan - the stoneware is heavy as hell, but it heats slowly and consistantly, allowing for a slow and consistant bake on the cookie. I no longer use my metal pans, because they will heat up too fast and burn. The only time I've ever burned cookies on the stoneware is when I forgot to set the timer and left the cookies in the over for about a half hour. What a mess. I can't reccommend these pans enough, though. I have some tart pans that I haven't used quite yet, but perhaps soon. And I have an 8" x 8" bar pan, too, that is wonderful - again, no burning, and consistant baking.

A little more background: I have a 29 year-old Jenn-Air electric stove that I hate. It came with the house, and I am really hoping this summer, when we do our remodeling (new roof & dormer), that I can squeek out a couple more bucks from the bank and get a new gas stove, as well as new countertops. The yellow just really has to go. The stove is ok, I just miss cooking and baking with gas. Also: it tends to overcook things at the back of the oven, and undercook those at the front. I suppose I could just stop being lazy and turn the pans halfway through cooking, but I am a little lazy.

After 12-15 minutes in the oven (the first batch always takes a little longer to cook, due to the pans needing a little bit more time to heat up) at 350 degrees, this is what happens:
Photo Sharing and Video Hosting at Photobucket

These cookies were lovely and delicious, with a perfect mouth texture, melting chocolate, and warmth. They are perfect for any time, for comfort food or an after school (or work) treat. They can be modified, with the chocolate being changed to white chocolate, dark chocolate, what have you. Chopped up candy bars (like a Hershey's with Almonds or a Snickers bar) are also excellent. Nuts, or no nuts. It's whatever you want for them to be.

And here's how to do it yourself:

Preheat your oven to 350 degrees. If you don't want to clean your pans, line them with silpat or parchement paper.

Take 1 cup (2 sticks) butter, 3/4 cup packed brown sugar and 3/4 cup white sugar and combine in a standing mixer or bowl. Using a hand mixer or the paddle attachment of the standing mixer, blend until well combined and creamy.

Add 2 large eggs and 1 tsp vanilla, mix until well blended.

Add 2-1/4 to 2-1/2 cups flour and 1 tsp baking soda and 1 tsp salt (I only add salt if I'm using unsalted/sweet butter) gradually, and mix well.

Add 2 cups of semi-sweet chips, or 1 cup of semi-sweet and 1 cup milk chocolate chips, or whatever you want - just make sure there's 2 cups of it. Also: if you want to add 1 cup roughly chopped nuts, this is the time to do it. Mix well, until all ingredients are well combined.

Drop dough by rounded tablespoonfuls onto pans. I find that you can fit about 15 cookies per pan - 3 up along the short side and 4 to 5 along the long side.

Bake for 12 minutes (15 if you are using stoneware, or if you like your cookies "well done"). Allow to cool for a few minutes so you don't burn the hell out of your mouth, then remove to a cooling rack, and dig in. These are sublime with the stereotypical glass of milk, if that's your bag. Or just standing at the sink, watching the early snowfall cover your yard.

Wednesday, April 4, 2007

Oh, because I love you so...

Here's what you will not see at the Tasty-Ugly Bakery. At least, it won't be made by my fingers.

Photo Sharing and Video Hosting at Photobucket

Or you can find it here, I AM NOT STEALING THIS AND GOING TO JAIL.
Martha Stewart's Marzipan Cake recipe and video


Isn't this redonkulous?

This happens to be the "Secret Garden Cake"... the one from years ago was a Vegetable Garden, but same-same.

But mine will taste better. And be far less futzy.

Welcome to the Tasty-Ugly Bakery!

I love to bake, and I hate my job.... well, hate is a strong word, but the prospect of working my job doesn't power me out of bed in the morning. So I have little fantasies about what my dream job would be, and the other day I came up with my latest dream: to bake delicious cakes, cookies, cupcakes and brownies. I have also recently added cheesecake to my oeuvre. I can't make pie-crust worth a damn, and other flaky things like croissants, while tasty, also terrify me. There is also no way - in the near future, at least - to have enough coin to get this bakery actually manifested and, most importantly, profitable. So I figured I could have a virtual bakery... I'll post some of my favorite recipes here, with photos, and make you all drool hard enough that you will all simultaneously wish this bakery into being. Then I can mail you the deliciousness!

About the name: I realize there could be some unsavory connotations about the phrase "tasty ugly". So it's important to keep that third word BAKERY firmly attached, like with royal icing, to Tasty-Ugly. I am not a talented cake decorator - those cupcakes in Martha Stewart and Cooks Country and all of those fine cooking magazines give me nightmares to try and recreate. Does anyone remember the garden cake that Martha had one time on her cover? With the precious marzipan vegetables and cookie-crumb dirt and fencing and piped grass? Yeah, you won't be finding that at the Tasty-Ugly Bakery. My real garden doesn't look like that. Besides, beautiful cakes - wedding cakes, bakery cakes, etc - rarely taste good. And if you're going to blow your calories on something, please make sure it's made with such delicious things as butter, white flour, sugar, and real eggs. This is a "sometimes" snack-blog, not an all-the-time snack-blog. I'm going to make cakes that might sag a little, or look a bit roughed-up, but I can damn-well guarantee you they will taste SCRUMPTIOUS.

Besides, someday if this thing ever does become real, telling your friends you'll "meet them at the Tasty-Ugly" sounds pretty cool. And if I can get enough recipes on here, maybe it could become a cookbook or something. I'll have to tweak recipes to make them my own, but that's not a problem, I love to bake and share my treats, and I welcome you!

So please close your eyes, push the virtual bakery door open, and let the smells of freshly baked cakes and cookies assault your senses. There are twinges of vanilla and ribbons of chocolate scenting the air, it's comfortable and warm inside, there's always a fresh pot of coffee on, so help yourself. Find a table in the window, with the strenghtening springtime sun warming it up, and leave your bags there. Come up to the counter, and choose from a wide selection of cupcakes, brownies and cookies to treat yourself now, or pick a cake for dessert tonight after your dinner party. It's not low fat, it's not low calorie, but you will enjoy every bite.

I look forward to seeing you again soon. I'll be posting a recipe per week or so, along with pictures and commentary on what worked and what didn't. Thanks for coming by!