I didn't have much luck with this month's challenge of Cheesecake Pops - the cheesecake came out tasting delicious, but there was no way of making them into pops without them flattening out. I could have left them in the oven for another 20 minutes or perhaps longer.
So I'm not going to post my pictures - they are HORRIBLE looking - and I didn't have any success with decorating, either. So perhaps the May challenge will go off much better. If I make this again, I plan on baking it much, much longer.
Monday, April 28, 2008
Monday, March 31, 2008
March Daring Bakers Challenge - Perfect Party Cake
(Let's try this again - as predicted, now I'm a day late. Oh well).
I really, really love to bake cakes. I'm good at it, they are always delicious, and they never LOOK like a bakery cake. Then again, I've yet to find a bakery cake that, quite frankly, tastes as good as my cakes.
This cake was a delight to make, a horror to decorate (due to my butter cream curdling from the time it was complete to the time I got it on the cake), and a huge hit all around to eat. It was light, rich tasting without being heavy (due, I think, to the lack of egg yolks in the batter, for which my dogs are very, very appreciative), and fun to think about the possibilities for future combinations.
PERFECT PARTY CAKE
Courtesy of Dorie Greenspan’s Baking from My Home to Yours
For the Cake
2 ½ cups cake flour
1 tablespoon baking powder
½ teaspoon salt
1 ¼ cups whole milk or buttermilk (I prefer buttermilk with the lemon)
4 large egg whites
1 ½ cups sugar
2 teaspoons grated lemon zest
1 stick (8 tablespoons or 4 ounces) unsalted butter, at room temperature
½ teaspoon pure lemon extract
For the Buttercream
1 cup sugar
4 large egg whites
3 sticks (12 ounces) unsalted butter, at room temperature
¼ cup fresh lemon juice (from 2 large lemons)
1 teaspoon pure vanilla extract
For Finishing
2/3 cup seedless raspberry preserves stirred vigorously or warmed gently until spreadable - I used Polamer AllFruit Cherry Preserves, and this was a wonderful compliment to the lemon and the coconut.
About 1 ½ cups sweetened shredded coconut
Getting Ready
Centre a rack in the oven and preheat the oven to 350 degrees F. Butter two 9 x 2 inch round cake pans and line the bottom of each pan with a round of buttered parchment or wax paper. Put the pans on a baking sheet.
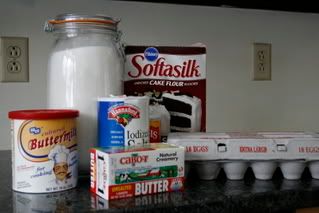
The Usual Suspects... I used cultured buttermilk, which works just as well as "regular" buttermilk. When it's in a powered form, you mix it with the dry ingredients, mix the eggs with the amount of water you'd use in place of the buttermilk, and away you go.
To Make the Cake
Sift together the flour, baking powder and salt.
Whisk together the milk and egg whites in a medium bowl.
Put the sugar and lemon zest in a mixer bowl or another large bowl and rub them together with your fingers until the sugar is moist and fragrant.
Add the butter and working with the paddle or whisk attachment, or with a hand mixer, beat at medium speed for a full 3 minutes, until the butter and sugar are very light.
Beat in the extract, then add one third of the flour mixture, still beating on medium speed.
Beat in half of the milk-egg mixture, then beat in half of the remaining dry ingredients until incorporated.
Add the rest of the milk and eggs beating until the batter is homogeneous, then add the last of the dry ingredients.
Finally, give the batter a good 2- minute beating to ensure that it is thoroughly mixed and well aerated.
Divide the batter between the two pans and smooth the tops with a rubber spatula.
Bake for 30-35 minutes, or until the cakes are well risen and springy to the touch – a thin knife inserted into the centers should come out clean
Transfer the cakes to cooling racks and cool for about 5 minutes, then run a knife around the sides of the cakes, unfold them and peel off the paper liners.
Invert and cool to room temperature, right side up (the cooled cake layers can be wrapped airtight and stored at room temperature overnight or frozen for up to two months).
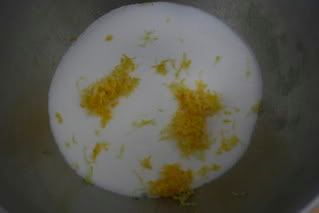
The lemon zest and sugar. The scent this gave off was unholy good. I wanted to rub it all over my body.
To Make the Buttercream
Put the sugar and egg whites in a mixer bowl or another large heatproof bowl, fit the bowl over a plan of simmering water and whisk constantly, keeping the mixture over the heat, until it feels hot to the touch, about 3 minutes.
The sugar should be dissolved, and the mixture will look like shiny marshmallow cream.
Remove the bowl from the heat.
Working with the whisk attachment or with a hand mixer, beat the meringue on medium speed until it is cool, about 5 minutes.
Switch to the paddle attachment if you have one, and add the butter a stick at a time, beating until smooth.
Once all the butter is in, beat in the buttercream on medium-high speed until it is thick and very smooth, 6-10 minutes.
During this time the buttercream may curdle or separate – just keep beating and it will come together again.
On medium speed, gradually beat in the lemon juice, waiting until each addition is absorbed before adding more, and then the vanilla.
You should have a shiny smooth, velvety, pristine white buttercream. Press a piece of plastic against the surface of the buttercream and set aside briefly.
I should note that I made the buttercream at home and then transported it to my mom's house for dinner that night, and the buttercream curdled in a most horrible way. Luckily, I was covering the frosting with coconut, so you couldn't tell that it was a problem. I would recommend that you NOT travel with the buttercream; make it instead at your destination.
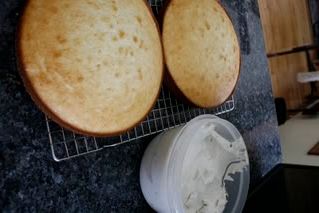
Cake layers and buttercream, ready to go to grandma's for eating.... The buttercream was in good shape when this picture was taken.
To Assemble the Cake
Using a sharp serrated knife and a gentle sawing motion, slice each layer horizontally in half.
Put one layer cut side up on a cardboard cake round or a cake plate protected by strips of wax or parchment paper.
Spread it with one third of the preserves.
Cover the jam evenly with about one quarter of the buttercream.
Top with another layer, spread with preserves and buttercream and then do the same with a third layer (you’ll have used all the jam and have buttercream leftover).
Place the last layer cut side down on top of the cake and use the remaining buttercream to frost the sides and top.
Press the coconut into the frosting, patting it gently all over the sides and top.
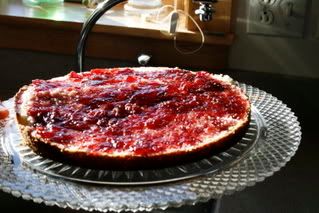
Instead of putting the preserves in with buttercream, I did a layer of preserves, then a cake layer, then a generous layer of buttercream, then another cake layer, followed by the last layer of preserves
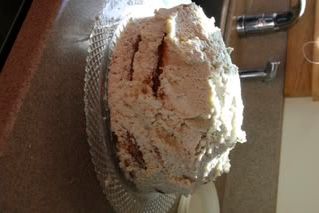
Something went horribly wrong with the buttercream. It looked like spackle, and would not spread smoothly. It also did not adhere well to the cake, and kept sliding off. I can assure you, it was cool, and room temperature, as was the cake.
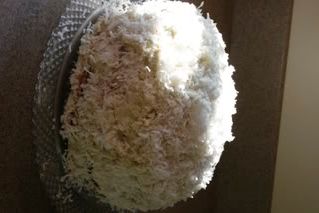
Coconut to the rescue!! The shredded coconut hid a multitude of sins caused by the buttercream, and made this look like a giant coconut snowball. Beautiful!
Serving
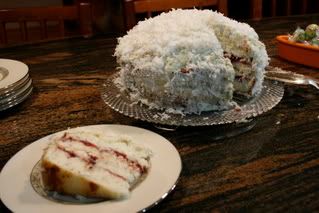
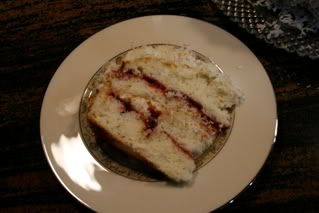
The cake is ready to serve as soon as it is assembled, but I think it’s best to let it sit and set for a couple of hours in a cool room – not the refrigerator. Whether you wait or slice and enjoy it immediately, the cake should be served at room temperature; it loses all its subtlety when it’s cold. Depending on your audience you can serve the cake with just about anything from milk to sweet or bubbly wine.
Storing
The cake is best the day it is made, but you can refrigerate it, well covered, for up to two days. Bring it to room temperature before serving. If you want to freeze the cake, slide it into the freezer to set, then wrap it really well – it will keep for up to 2 months in the freezer; defrost it, still wrapped overnight in the refrigerator.
Playing Around
Since lemon is such a friendly flavour, feel free to make changes in the preserves: other red preserves – cherry or strawberry – look especially nice, but you can even use plum or blueberry jam.
Fresh Berry Cake
If you will be serving the cake the day it is made, cover each layer of buttercream with fresh berries – use whole raspberries, sliced or halved strawberries or whole blackberries, and match the preserves to the fruit. You can replace the coconut on top of the cake with a crown of berries, or use both coconut and berries. You can also replace the buttercream between the layers with fairly firmly whipped sweetened cream and then either frost the cake with buttercream (the contrast between the lighter whipped cream and the firmer buttercream is nice) or finish it with more whipped cream. If you use whipped cream, you’ll have to store the cake the in the refrigerator – let it sit for about 20 minutes at room temperature before serving.
Jenn's notes: I served this cake at my mom's house on the Friday before Easter to my parents, my brother and his wife, and her parents. It got glowing reviews all around - I was most pleased that the cake was nice and moist, not at all dry (it had been made on the same day, however, so I don't know if making it well ahead of time and frozen would make a difference), flavorful without being overwhelmingly lemony, and overall delicious. It could be made into a sheet cake, easily, for an even smoother transition for travel - perfect for baby showers, bridal showers, mother's day and other springtime celebrations, when the world is waking up. This cake will most assuredly wake up your tastebuds. I plan on making it with blueberry preserves, blackberries, fresh strawberries, and raspberries at some point this summer (not all at the same time - it just lends itself beautifully to all fruits). I would stay away from lemon curd - this would tip the balance of lemon to an overpowering citrus flavor - and chocolate-flavors. I think Nutella would be too heavy for this light, refreshing dessert. And served with Prosecco would be delightful to the extreme!
A great recipe... I really enjoyed it and will be adding it to my recipe collection for a festive, delicious dessert. Thank you for the challenge!
TAGS:
cake, coconut, Daring Baker, dessert, fruit, lemon, light, march, springtime
I really, really love to bake cakes. I'm good at it, they are always delicious, and they never LOOK like a bakery cake. Then again, I've yet to find a bakery cake that, quite frankly, tastes as good as my cakes.
This cake was a delight to make, a horror to decorate (due to my butter cream curdling from the time it was complete to the time I got it on the cake), and a huge hit all around to eat. It was light, rich tasting without being heavy (due, I think, to the lack of egg yolks in the batter, for which my dogs are very, very appreciative), and fun to think about the possibilities for future combinations.
PERFECT PARTY CAKE
Courtesy of Dorie Greenspan’s Baking from My Home to Yours
For the Cake
2 ½ cups cake flour
1 tablespoon baking powder
½ teaspoon salt
1 ¼ cups whole milk or buttermilk (I prefer buttermilk with the lemon)
4 large egg whites
1 ½ cups sugar
2 teaspoons grated lemon zest
1 stick (8 tablespoons or 4 ounces) unsalted butter, at room temperature
½ teaspoon pure lemon extract
For the Buttercream
1 cup sugar
4 large egg whites
3 sticks (12 ounces) unsalted butter, at room temperature
¼ cup fresh lemon juice (from 2 large lemons)
1 teaspoon pure vanilla extract
For Finishing
2/3 cup seedless raspberry preserves stirred vigorously or warmed gently until spreadable - I used Polamer AllFruit Cherry Preserves, and this was a wonderful compliment to the lemon and the coconut.
About 1 ½ cups sweetened shredded coconut
Getting Ready
Centre a rack in the oven and preheat the oven to 350 degrees F. Butter two 9 x 2 inch round cake pans and line the bottom of each pan with a round of buttered parchment or wax paper. Put the pans on a baking sheet.

The Usual Suspects... I used cultured buttermilk, which works just as well as "regular" buttermilk. When it's in a powered form, you mix it with the dry ingredients, mix the eggs with the amount of water you'd use in place of the buttermilk, and away you go.
To Make the Cake
Sift together the flour, baking powder and salt.
Whisk together the milk and egg whites in a medium bowl.
Put the sugar and lemon zest in a mixer bowl or another large bowl and rub them together with your fingers until the sugar is moist and fragrant.
Add the butter and working with the paddle or whisk attachment, or with a hand mixer, beat at medium speed for a full 3 minutes, until the butter and sugar are very light.
Beat in the extract, then add one third of the flour mixture, still beating on medium speed.
Beat in half of the milk-egg mixture, then beat in half of the remaining dry ingredients until incorporated.
Add the rest of the milk and eggs beating until the batter is homogeneous, then add the last of the dry ingredients.
Finally, give the batter a good 2- minute beating to ensure that it is thoroughly mixed and well aerated.
Divide the batter between the two pans and smooth the tops with a rubber spatula.
Bake for 30-35 minutes, or until the cakes are well risen and springy to the touch – a thin knife inserted into the centers should come out clean
Transfer the cakes to cooling racks and cool for about 5 minutes, then run a knife around the sides of the cakes, unfold them and peel off the paper liners.
Invert and cool to room temperature, right side up (the cooled cake layers can be wrapped airtight and stored at room temperature overnight or frozen for up to two months).

The lemon zest and sugar. The scent this gave off was unholy good. I wanted to rub it all over my body.
To Make the Buttercream
Put the sugar and egg whites in a mixer bowl or another large heatproof bowl, fit the bowl over a plan of simmering water and whisk constantly, keeping the mixture over the heat, until it feels hot to the touch, about 3 minutes.
The sugar should be dissolved, and the mixture will look like shiny marshmallow cream.
Remove the bowl from the heat.
Working with the whisk attachment or with a hand mixer, beat the meringue on medium speed until it is cool, about 5 minutes.
Switch to the paddle attachment if you have one, and add the butter a stick at a time, beating until smooth.
Once all the butter is in, beat in the buttercream on medium-high speed until it is thick and very smooth, 6-10 minutes.
During this time the buttercream may curdle or separate – just keep beating and it will come together again.
On medium speed, gradually beat in the lemon juice, waiting until each addition is absorbed before adding more, and then the vanilla.
You should have a shiny smooth, velvety, pristine white buttercream. Press a piece of plastic against the surface of the buttercream and set aside briefly.
I should note that I made the buttercream at home and then transported it to my mom's house for dinner that night, and the buttercream curdled in a most horrible way. Luckily, I was covering the frosting with coconut, so you couldn't tell that it was a problem. I would recommend that you NOT travel with the buttercream; make it instead at your destination.

Cake layers and buttercream, ready to go to grandma's for eating.... The buttercream was in good shape when this picture was taken.
To Assemble the Cake
Using a sharp serrated knife and a gentle sawing motion, slice each layer horizontally in half.
Put one layer cut side up on a cardboard cake round or a cake plate protected by strips of wax or parchment paper.
Spread it with one third of the preserves.
Cover the jam evenly with about one quarter of the buttercream.
Top with another layer, spread with preserves and buttercream and then do the same with a third layer (you’ll have used all the jam and have buttercream leftover).
Place the last layer cut side down on top of the cake and use the remaining buttercream to frost the sides and top.
Press the coconut into the frosting, patting it gently all over the sides and top.

Instead of putting the preserves in with buttercream, I did a layer of preserves, then a cake layer, then a generous layer of buttercream, then another cake layer, followed by the last layer of preserves

Something went horribly wrong with the buttercream. It looked like spackle, and would not spread smoothly. It also did not adhere well to the cake, and kept sliding off. I can assure you, it was cool, and room temperature, as was the cake.

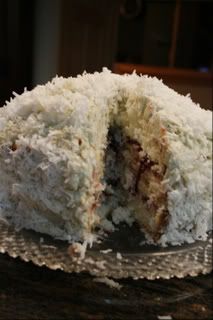
Coconut to the rescue!! The shredded coconut hid a multitude of sins caused by the buttercream, and made this look like a giant coconut snowball. Beautiful!
Serving
The cake is ready to serve as soon as it is assembled, but I think it’s best to let it sit and set for a couple of hours in a cool room – not the refrigerator. Whether you wait or slice and enjoy it immediately, the cake should be served at room temperature; it loses all its subtlety when it’s cold. Depending on your audience you can serve the cake with just about anything from milk to sweet or bubbly wine.


Storing
The cake is best the day it is made, but you can refrigerate it, well covered, for up to two days. Bring it to room temperature before serving. If you want to freeze the cake, slide it into the freezer to set, then wrap it really well – it will keep for up to 2 months in the freezer; defrost it, still wrapped overnight in the refrigerator.
Playing Around
Since lemon is such a friendly flavour, feel free to make changes in the preserves: other red preserves – cherry or strawberry – look especially nice, but you can even use plum or blueberry jam.
Fresh Berry Cake
If you will be serving the cake the day it is made, cover each layer of buttercream with fresh berries – use whole raspberries, sliced or halved strawberries or whole blackberries, and match the preserves to the fruit. You can replace the coconut on top of the cake with a crown of berries, or use both coconut and berries. You can also replace the buttercream between the layers with fairly firmly whipped sweetened cream and then either frost the cake with buttercream (the contrast between the lighter whipped cream and the firmer buttercream is nice) or finish it with more whipped cream. If you use whipped cream, you’ll have to store the cake the in the refrigerator – let it sit for about 20 minutes at room temperature before serving.
Jenn's notes: I served this cake at my mom's house on the Friday before Easter to my parents, my brother and his wife, and her parents. It got glowing reviews all around - I was most pleased that the cake was nice and moist, not at all dry (it had been made on the same day, however, so I don't know if making it well ahead of time and frozen would make a difference), flavorful without being overwhelmingly lemony, and overall delicious. It could be made into a sheet cake, easily, for an even smoother transition for travel - perfect for baby showers, bridal showers, mother's day and other springtime celebrations, when the world is waking up. This cake will most assuredly wake up your tastebuds. I plan on making it with blueberry preserves, blackberries, fresh strawberries, and raspberries at some point this summer (not all at the same time - it just lends itself beautifully to all fruits). I would stay away from lemon curd - this would tip the balance of lemon to an overpowering citrus flavor - and chocolate-flavors. I think Nutella would be too heavy for this light, refreshing dessert. And served with Prosecco would be delightful to the extreme!
A great recipe... I really enjoyed it and will be adding it to my recipe collection for a festive, delicious dessert. Thank you for the challenge!
TAGS:
cake, coconut, Daring Baker, dessert, fruit, lemon, light, march, springtime
Tuesday, March 25, 2008
Sorry
Between a crazy week, being 7-1/2 months pregnant with a 3-year-old, and working full time, I got all turned around and posted the challenge a week early. Apologies to all - you people are STICKLERS!
Look for the post Sunday. Of course, I'll probably space it and post it Monday, because that's just how I roll.
Look for the post Sunday. Of course, I'll probably space it and post it Monday, because that's just how I roll.
Friday, February 29, 2008
February Challenge - Julia's French Bread
(for some reason I can't get the images to resize - apologies)
Heh. Remember what I said about yeast-risen things and how I'm terrified of them, etc, etc? Well, the joke's on me because that's just what the February Daring Baker's challenge was.... great. French bread, no less. The fewest number of ingredients, but the most fiddly. However, since I skipped January's Challenge of Lemon Meringue pie, I had to do this so here I went!
I will say that, while bread is one of my favorite things to eat, it's not really at all my favorite thing to make, unless it's a quick bread like zucchinni or banana or date-nut bread. There's no rising involved, you mix everything together, and throw it in the oven. An hour or so later, it's done, it's delicious. I have always envied those who enjoy making bread - my uncle, and my mom's best friend each take a day each week to make their bread for the coming days. I love the concept.... but I don't love the execution. I haven't ever had success with breads that require rising time. I don't know if my yeasts are old, or if my house is too cold to foster a proper rise, or what. But they usually come out like bricks.
To get the full recipe, you can go here
Here are some pictures and notes of my progress:
The Ingredients, Part I
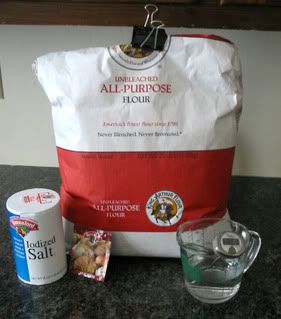
Salt, yeast, all-purpose, unbleached flour, and water. See my thermometer? It was 100 degrees on the mark.
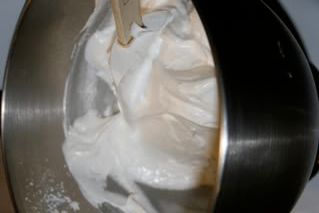
The Ingredients, Part II
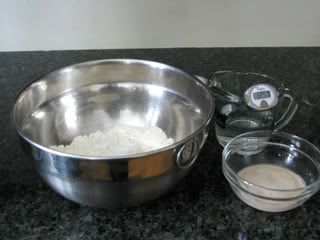
After mixing the yeast with the water and the flour and salt together, right before everything was mixed together.
I Need to Knead
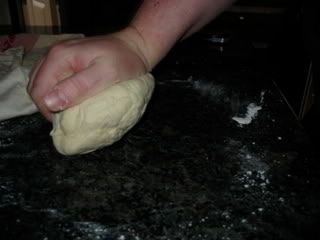
After mixing everything together, here's the kneading for the first pass. I have to say, I do enjoy kneading - it's a great movement that really works the arms and feels fantastic when the ingredients blend and merge.
After the first rise
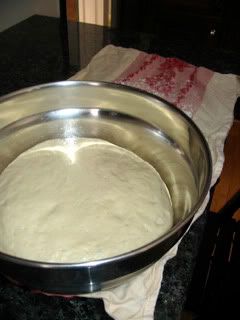
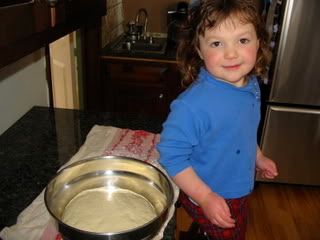
My little helper got a little piece of dough to beat up so that I could futz with the dough and get it ready to rise again. I did the first 2 rises in the oven, which seemed to work out well, but the 2nd time I put the towel on over the plastic, it kind of fell into the bowl and I think it kept the 2nd rise from true success.
Ready for More
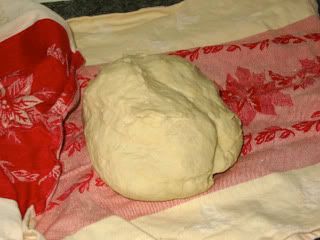
This was post-2nd rise, getting the dough ready for its resting and 3rd rise. Because I am slightly lazy and pregnant, I opted to do 1 large boule-type of loaf.
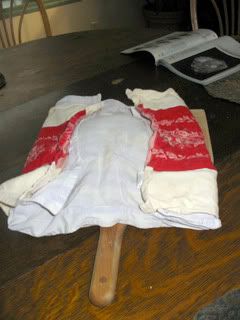
I think this is where I ran into a little more trouble - my house is cool, and it was a cool, not-sunny day. If the sun had been out, the room that this third rise took place would have been much warmer. It did go to be fairly large, though, with the wrappings and all. And my cats didn't bother the dough, which was unprecidented.
Baker, Baker

Here's the hedgehog loaf (so-called due to how the cuts in the dough came out), after I brushed it with water. I did this, and the crust was lovely.
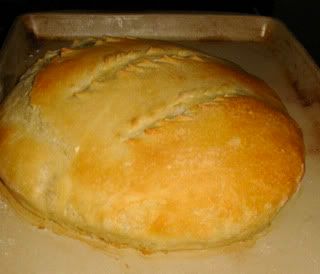
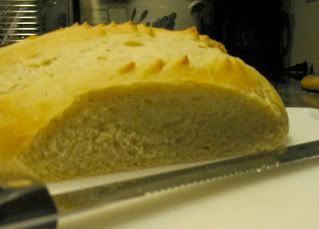
After coming out of the oven. Nice color, a little flat but still lovely.
I couldn't wait for the bread to cool before eating it - for one thing, it smelled too good, and second, this bread had taken all day to make, and it was dinner-time so we had it with our supper.
Overall, I'll say that this was a fun challenge, but it wasn't fun enough or worthwhile enough to commit to making my own bread. I have a high respect for those who do make their own bread - it takes time and patience, and I don't have much of either of those qualities right now. It was tasty, and it makes some delicious toast with honey in the morning. So, thank you for the challenge! It's certainly a departure from what I would normally bake!
Heh. Remember what I said about yeast-risen things and how I'm terrified of them, etc, etc? Well, the joke's on me because that's just what the February Daring Baker's challenge was.... great. French bread, no less. The fewest number of ingredients, but the most fiddly. However, since I skipped January's Challenge of Lemon Meringue pie, I had to do this so here I went!
I will say that, while bread is one of my favorite things to eat, it's not really at all my favorite thing to make, unless it's a quick bread like zucchinni or banana or date-nut bread. There's no rising involved, you mix everything together, and throw it in the oven. An hour or so later, it's done, it's delicious. I have always envied those who enjoy making bread - my uncle, and my mom's best friend each take a day each week to make their bread for the coming days. I love the concept.... but I don't love the execution. I haven't ever had success with breads that require rising time. I don't know if my yeasts are old, or if my house is too cold to foster a proper rise, or what. But they usually come out like bricks.
To get the full recipe, you can go here
Here are some pictures and notes of my progress:
The Ingredients, Part I

Salt, yeast, all-purpose, unbleached flour, and water. See my thermometer? It was 100 degrees on the mark.
The Ingredients, Part II

After mixing the yeast with the water and the flour and salt together, right before everything was mixed together.
I Need to Knead

After mixing everything together, here's the kneading for the first pass. I have to say, I do enjoy kneading - it's a great movement that really works the arms and feels fantastic when the ingredients blend and merge.
After the first rise


My little helper got a little piece of dough to beat up so that I could futz with the dough and get it ready to rise again. I did the first 2 rises in the oven, which seemed to work out well, but the 2nd time I put the towel on over the plastic, it kind of fell into the bowl and I think it kept the 2nd rise from true success.
Ready for More

This was post-2nd rise, getting the dough ready for its resting and 3rd rise. Because I am slightly lazy and pregnant, I opted to do 1 large boule-type of loaf.

I think this is where I ran into a little more trouble - my house is cool, and it was a cool, not-sunny day. If the sun had been out, the room that this third rise took place would have been much warmer. It did go to be fairly large, though, with the wrappings and all. And my cats didn't bother the dough, which was unprecidented.
Baker, Baker

Here's the hedgehog loaf (so-called due to how the cuts in the dough came out), after I brushed it with water. I did this, and the crust was lovely.

After coming out of the oven. Nice color, a little flat but still lovely.
I couldn't wait for the bread to cool before eating it - for one thing, it smelled too good, and second, this bread had taken all day to make, and it was dinner-time so we had it with our supper.

Overall, I'll say that this was a fun challenge, but it wasn't fun enough or worthwhile enough to commit to making my own bread. I have a high respect for those who do make their own bread - it takes time and patience, and I don't have much of either of those qualities right now. It was tasty, and it makes some delicious toast with honey in the morning. So, thank you for the challenge! It's certainly a departure from what I would normally bake!
Sunday, December 23, 2007
December Challenge - Buche de Noel
There aren't many things that terrify me in the kitchen when I'm baking. One is pastry flour, the other is yeast-rising type things, and the other three things are: anything involving a pastry bag and frosting; rolling cakes, and buttercream. The Buche de Noel uses these last three things, big-time.
Let's get started, shall we? I woked backwards when I made this cake: decoration, filling, cake, frosting.
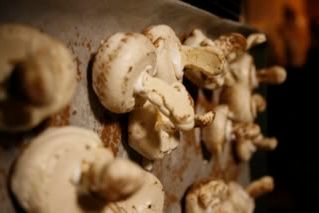
The Mushrooms
I opted to make the meringue mushrooms - I'm not a fan of marzipan, so I braved the pastry bag and went for it. I preheated the oven to 225 d F and lined 22 baking sheets with parchment. I got my pastry bag fitted with my tip - I didn't have a #6 so I used a #4. To make the meringues, I combined 3 room temperature egg whites and 1/4 tsp cream of tartar in my mixer's bowl (making sure there was no trace of errant fat in the bowl) and beat them until very foamy. I slowly added 1/2 cup granulated sugar and increased the speed to high and beat until soft peaks formed. I continuted until the whites were very stiff and shiny, then folded in 1/3 cup confectioner's sugar with a rubber spatula.
I scooped the mixture into the pastry bag, and piped as many stems as I could onto one sheet- at first they looked like piles of white spaghetti but as I got more comfortable with the movements, I was able to make some decent stems. On the other sheet, I made caps - once I figured out that I could just squoosh a bunch of meringue into a ball, the caps came out beautifully. I smoothed out any points, and dusted everything with cocoa.
These all baked for 55 minutes, then I removed them, flipped the caps upside down, poked holes in them, took the stems and dipped them in the remaining meringue, and married the two together. They went back into the oven for 15 minutes, then got to spend the night in a tupperware container, until I was ready to garnish.
The Filling
I decided to make something different for the filling, so I went to my favorite chocolate pudding recipe and made that up. It's in the Joy of Cooking, and it is a miracle in a bowl. Lots of cocoa powder, sugar, and milk (I used 1/2 half and half and 1/2 milk to save a few precious calories).
When the pudding had set, I peeled off the skin (the best part, hands-down) and whipped up some cream. I let the pudding come to room temperature, and after the cream had been whipped, I slowly added it in. This made a beautiful, delicious mousse-like filling.
The Cake
The cake was a plain genoiose, and was very easy to make. I had been warned by people at work (I work for a food magazine, not in the kitchen) not to overcook, because this could end up being very dry.
I preheated the overn to 400 d F, prepped my jelly roll pan by buttering it and then putting a parchment sheet down and buttered that, then filled a medium saucepan with water and boiled it. I combined 3 large eggs, 3 egg yolks, a pinch of salt and 3/4 cup sugar in my mixer's bowl and placed the bowl in the hot water on the stove. I wisked until the mixture was 100 d, then put the bowl in the mixer and whipped with the whisk until the mixture had cooled and tripled in volume - this took about 20 minutes on medium-high.
After whisking 1/2 cup of cake flour and 1/4 cup of cornstarch together, I sifted them in three batched over the egg mixture and folded it in. It was tough to make sure i had gotten all the lumps out, because I didn't want to overbeat the batter. Finally it was ready to go in the pan and into the oven.
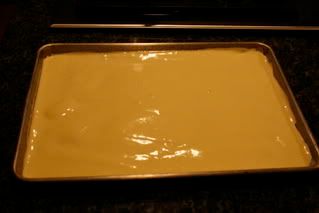
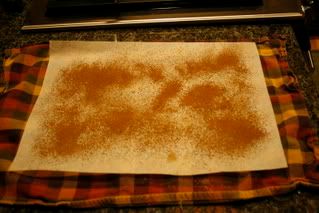
I baked the cake for only 10 minutes, then removed it from the oven and let it cool just slighly while I got the rolling stuff together. I had also been advised by my friends at work that it's best to roll the cake while it's still warm (which is why I made the filling first. They told me to put a clean kitchen towel down, then another piece of parchement, then dust the parchment with cocoa to keep the cake from sticking.
I quickly transferred the cake to the rolling station, and it was already cool enough to fill with the filling, so on it went, and away I rolled. I filled it with my chocolate mousse and rolled it up as tighly as I could. The cake was so delicate, it did crack a little, and I think I maybe had too much filling in there.
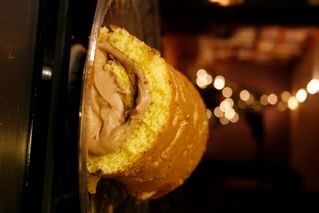
I transferred the cake to the plate, and I thought that that was really the biggest challenge. It was so mooshy, and so delicate, I thought I'd drop it or break it. But I made it, so it got wrapped up tightly and put in the fridge to set up overnight. I made the mushrooms, the cake, and the filling on Friday afternoon.
The Frosting
Yesterday (Saturday) I made the buttercream frosting, and was a little afraid It would separate. It kind of did, but it still tasted delicious. I made only 1/2 the recipe because I had used something else for the filling, and wouldn't need much for the outside.
I took 2 large egg whites and 1/2 cup of sugar and whisked it together in the bowl of my mixer, then put the bowl over more simmering water and whisked until the sugar had dissolved and the egg whites were hot. I put the bowl on the mixer and whipped with the whisk attachment on medium until it was cooled, then switched to the paddle and beat in 12 tbsp of softened unsalted butter. This went ok, but there was not as much of a consistent blend as I would have liked to see. I dissolved 1 tbsp instant espresso powder into 1 tbsp kahlua (I didn't have any brandy or rum, and figured the kahlua would bring out the coffee flavor) and put it into the butter/egg/sugar mixture. The frosting was too soft when I was done so I decided to let it set up in the fridge for a little while. It was quite liquid-y.
About an hour later, I frosted the cake with the buttercream and drew some fork lines in it - the lines were more like a shaggy bark than clean decoration, but I thought it looked good. I applied the mushrooms, and put a little green around the cake.
Then I thought: hey, it's winter, let's put some pow-pow on for snow!
So I did that, and it looked great.
We had a party to go to last night, so this was what I brought. People thought the mushrooms were really real, and were delighted at the taste of the cake, as was my husband. I'm pleased too - I wish the frosting had come out a little better, but all in all this cake reminded me that i have nothing to fear in the kitchen (excepting, perhaps, my inability to really decorate well). It was tasty, though! A little more work-intensive than I care to undertake when I want a cake, but it would be nice for a special occassion, for sure.
Happy Yule and Holiday to you all! Thanks for this challenge!
Let's get started, shall we? I woked backwards when I made this cake: decoration, filling, cake, frosting.
The Mushrooms
I opted to make the meringue mushrooms - I'm not a fan of marzipan, so I braved the pastry bag and went for it. I preheated the oven to 225 d F and lined 22 baking sheets with parchment. I got my pastry bag fitted with my tip - I didn't have a #6 so I used a #4. To make the meringues, I combined 3 room temperature egg whites and 1/4 tsp cream of tartar in my mixer's bowl (making sure there was no trace of errant fat in the bowl) and beat them until very foamy. I slowly added 1/2 cup granulated sugar and increased the speed to high and beat until soft peaks formed. I continuted until the whites were very stiff and shiny, then folded in 1/3 cup confectioner's sugar with a rubber spatula.

I scooped the mixture into the pastry bag, and piped as many stems as I could onto one sheet- at first they looked like piles of white spaghetti but as I got more comfortable with the movements, I was able to make some decent stems. On the other sheet, I made caps - once I figured out that I could just squoosh a bunch of meringue into a ball, the caps came out beautifully. I smoothed out any points, and dusted everything with cocoa.

These all baked for 55 minutes, then I removed them, flipped the caps upside down, poked holes in them, took the stems and dipped them in the remaining meringue, and married the two together. They went back into the oven for 15 minutes, then got to spend the night in a tupperware container, until I was ready to garnish.

The Filling
I decided to make something different for the filling, so I went to my favorite chocolate pudding recipe and made that up. It's in the Joy of Cooking, and it is a miracle in a bowl. Lots of cocoa powder, sugar, and milk (I used 1/2 half and half and 1/2 milk to save a few precious calories).

When the pudding had set, I peeled off the skin (the best part, hands-down) and whipped up some cream. I let the pudding come to room temperature, and after the cream had been whipped, I slowly added it in. This made a beautiful, delicious mousse-like filling.
The Cake
The cake was a plain genoiose, and was very easy to make. I had been warned by people at work (I work for a food magazine, not in the kitchen) not to overcook, because this could end up being very dry.
I preheated the overn to 400 d F, prepped my jelly roll pan by buttering it and then putting a parchment sheet down and buttered that, then filled a medium saucepan with water and boiled it. I combined 3 large eggs, 3 egg yolks, a pinch of salt and 3/4 cup sugar in my mixer's bowl and placed the bowl in the hot water on the stove. I wisked until the mixture was 100 d, then put the bowl in the mixer and whipped with the whisk until the mixture had cooled and tripled in volume - this took about 20 minutes on medium-high.
After whisking 1/2 cup of cake flour and 1/4 cup of cornstarch together, I sifted them in three batched over the egg mixture and folded it in. It was tough to make sure i had gotten all the lumps out, because I didn't want to overbeat the batter. Finally it was ready to go in the pan and into the oven.

I baked the cake for only 10 minutes, then removed it from the oven and let it cool just slighly while I got the rolling stuff together. I had also been advised by my friends at work that it's best to roll the cake while it's still warm (which is why I made the filling first. They told me to put a clean kitchen towel down, then another piece of parchement, then dust the parchment with cocoa to keep the cake from sticking.

I quickly transferred the cake to the rolling station, and it was already cool enough to fill with the filling, so on it went, and away I rolled. I filled it with my chocolate mousse and rolled it up as tighly as I could. The cake was so delicate, it did crack a little, and I think I maybe had too much filling in there.

I transferred the cake to the plate, and I thought that that was really the biggest challenge. It was so mooshy, and so delicate, I thought I'd drop it or break it. But I made it, so it got wrapped up tightly and put in the fridge to set up overnight. I made the mushrooms, the cake, and the filling on Friday afternoon.
The Frosting
Yesterday (Saturday) I made the buttercream frosting, and was a little afraid It would separate. It kind of did, but it still tasted delicious. I made only 1/2 the recipe because I had used something else for the filling, and wouldn't need much for the outside.
I took 2 large egg whites and 1/2 cup of sugar and whisked it together in the bowl of my mixer, then put the bowl over more simmering water and whisked until the sugar had dissolved and the egg whites were hot. I put the bowl on the mixer and whipped with the whisk attachment on medium until it was cooled, then switched to the paddle and beat in 12 tbsp of softened unsalted butter. This went ok, but there was not as much of a consistent blend as I would have liked to see. I dissolved 1 tbsp instant espresso powder into 1 tbsp kahlua (I didn't have any brandy or rum, and figured the kahlua would bring out the coffee flavor) and put it into the butter/egg/sugar mixture. The frosting was too soft when I was done so I decided to let it set up in the fridge for a little while. It was quite liquid-y.
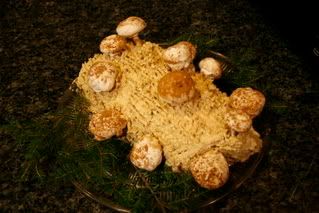
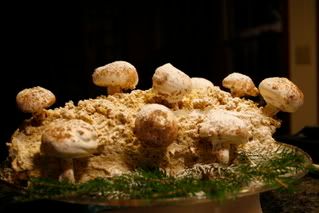
About an hour later, I frosted the cake with the buttercream and drew some fork lines in it - the lines were more like a shaggy bark than clean decoration, but I thought it looked good. I applied the mushrooms, and put a little green around the cake.

Then I thought: hey, it's winter, let's put some pow-pow on for snow!
So I did that, and it looked great.

We had a party to go to last night, so this was what I brought. People thought the mushrooms were really real, and were delighted at the taste of the cake, as was my husband. I'm pleased too - I wish the frosting had come out a little better, but all in all this cake reminded me that i have nothing to fear in the kitchen (excepting, perhaps, my inability to really decorate well). It was tasty, though! A little more work-intensive than I care to undertake when I want a cake, but it would be nice for a special occassion, for sure.
Happy Yule and Holiday to you all! Thanks for this challenge!
Wednesday, December 12, 2007
Cookie, cookie, cookie starts with "C"
Here are some treats from our baking extravaganza... oh, if only you could taste them all!
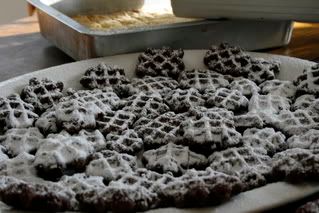
The wonderful, damn, addictive Hats:
Boot Tracks (I'm not saying WHAT it looks like you stepped in, but it does taste pretty darn good):
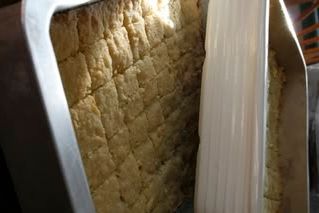
Scottish shortbread: flour, sugar, butter. That's all that needs to be said.
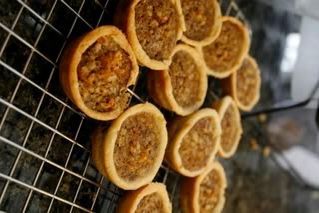
Pecan tartlettes that my mom had to wing the recipe for, but they still turned out quite nicely:
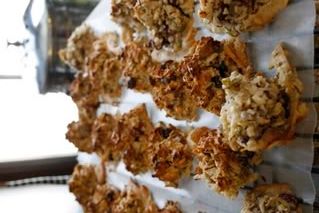
Cranberry, pistachio, almond macaroons. Something went a little funny on the recipe, but that did not - I repeat did NOT - keep me from eating more than my fair share:
This isn't even all of the stuff we made.... All in all we had about 50 dozen cookies, and most of them went away to friends & family. We used about 12 lbs of butter, at least 5 lbs of sugar (brown and white), 3 dozen eggs, and a bunch of flour, vanilla, and nuts. It's all good. Happy holidays! (if you'd like any of these recipes, please let me know and I'll post them).
The wonderful, damn, addictive Hats:
Boot Tracks (I'm not saying WHAT it looks like you stepped in, but it does taste pretty darn good):
Scottish shortbread: flour, sugar, butter. That's all that needs to be said.
Pecan tartlettes that my mom had to wing the recipe for, but they still turned out quite nicely:
Cranberry, pistachio, almond macaroons. Something went a little funny on the recipe, but that did not - I repeat did NOT - keep me from eating more than my fair share:
This isn't even all of the stuff we made.... All in all we had about 50 dozen cookies, and most of them went away to friends & family. We used about 12 lbs of butter, at least 5 lbs of sugar (brown and white), 3 dozen eggs, and a bunch of flour, vanilla, and nuts. It's all good. Happy holidays! (if you'd like any of these recipes, please let me know and I'll post them).
Monday, December 3, 2007
Hats! Hats! Everywhere!
Oh my god.
The hats have arrived.
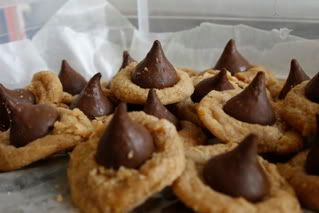
Next weekend my friend M and my mom and P and I will be doing our annual holiday cookie baking - I have to make something in the area of 36 dozen cookies to send to family and friends - and yesterday I thought I'd get a jump on some of the cookies so I made Peanut Butter Kiss cookies. These are the simplest cookie to make, ever. 4 ingredients. That's all. But for some reason I only make them around Christmas.
They are so simple that one time I gave the recipe to a friend who thought it was incorrect because there wasn't a ton of ingredients and measuring. So she found some other recipe that had flour and cinnamon and a ton of unnecessary things and made them, and they really tasted like crap. Follow this recipe. Trust me. And I see that Hershey is trying to capitolize on the popularity of this by selling kits. This is easier and cheaper and probably better than their package of preservatives.
I don't know if they're better right out of the oven (all mooshy and melty) or better after they've been in the garage, wrapped up against critters, frozen and a little crunchy. Either way, they're awesome. The cheaper the peanut butter, the better. The toughest thing about these cookies is YOU NEED TO WAIT. You can't take them off the cookie sheet too soon or else they turn to little trainwrecks of mush. They still taste delicious, but they look horrible.
So here you go. And I think I'll be making more, to "get a further jump on my baking for next weekend" (ahem!) and I'll also try to take some pictures. Enjoy!
1 cup peanut butter
1 cup sugar
1 egg
Preheat oven to 350 degrees F.
Mix peanut butter, sugar and egg together well. Let sit for about 5 minutes while you unwrap Hershey Kisses.
Roll into balls about 1/2" in diameter, place onto cookie sheet - they can go close together.
Take a kiss, push it into the ball of dough gently, until the ball is slightly flattened out.
Bake for 12 minutes
Remove from oven, let sit on cookie sheet for 10-15 minutes. Remove, cool, enjoy.
These can be frozen or refrigerated. They are delicious!!!!
The hats have arrived.
Next weekend my friend M and my mom and P and I will be doing our annual holiday cookie baking - I have to make something in the area of 36 dozen cookies to send to family and friends - and yesterday I thought I'd get a jump on some of the cookies so I made Peanut Butter Kiss cookies. These are the simplest cookie to make, ever. 4 ingredients. That's all. But for some reason I only make them around Christmas.
They are so simple that one time I gave the recipe to a friend who thought it was incorrect because there wasn't a ton of ingredients and measuring. So she found some other recipe that had flour and cinnamon and a ton of unnecessary things and made them, and they really tasted like crap. Follow this recipe. Trust me. And I see that Hershey is trying to capitolize on the popularity of this by selling kits. This is easier and cheaper and probably better than their package of preservatives.
I don't know if they're better right out of the oven (all mooshy and melty) or better after they've been in the garage, wrapped up against critters, frozen and a little crunchy. Either way, they're awesome. The cheaper the peanut butter, the better. The toughest thing about these cookies is YOU NEED TO WAIT. You can't take them off the cookie sheet too soon or else they turn to little trainwrecks of mush. They still taste delicious, but they look horrible.
So here you go. And I think I'll be making more, to "get a further jump on my baking for next weekend" (ahem!) and I'll also try to take some pictures. Enjoy!
1 cup peanut butter
1 cup sugar
1 egg
Preheat oven to 350 degrees F.
Mix peanut butter, sugar and egg together well. Let sit for about 5 minutes while you unwrap Hershey Kisses.
Roll into balls about 1/2" in diameter, place onto cookie sheet - they can go close together.
Take a kiss, push it into the ball of dough gently, until the ball is slightly flattened out.
Bake for 12 minutes
Remove from oven, let sit on cookie sheet for 10-15 minutes. Remove, cool, enjoy.
These can be frozen or refrigerated. They are delicious!!!!
Subscribe to:
Posts (Atom)
